
We have developed our web based VPS Control Panel from the ground up, which we have designed to give you more control over your VPS than anyone else does. You will be amazed at just how much power we have given you! Plus, if you have multiple VPS’ with us, they all appear in the one Control Panel, so no need to keep track of multiple logins.
If you just want to get going as quickly as possible, or some of the concepts presented seem quite alien/uninteresting to you, don’t worry! Each option/setting throughout the control panel has useful help text that appears on the right whenever you click on it. Additionally, each option has a safe default setting. The vast majority can just be left untouched if you are unsure what to do.
General Settings
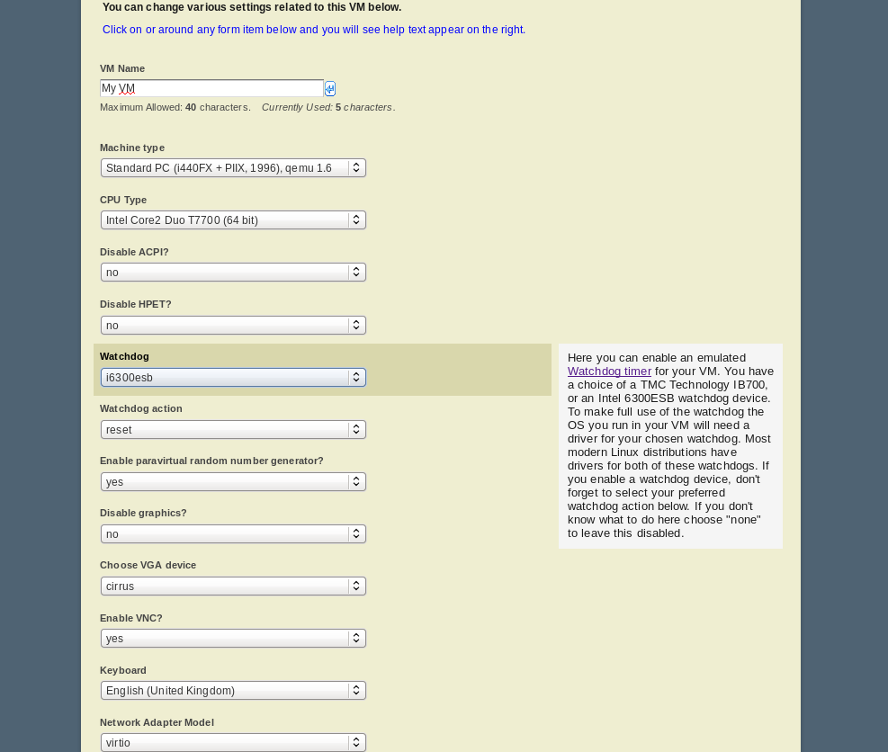
Each VPS has a settings page where you can choose QEMU machine type, CPU type, network adapter model, VGA device model, keyboard language (if using VNC) and more. You can also enable/disable features like ACPI, HPET, VNC, watchdog device (select model as well as disable/enable), and paravirtual random number generator.
Multiple Disks
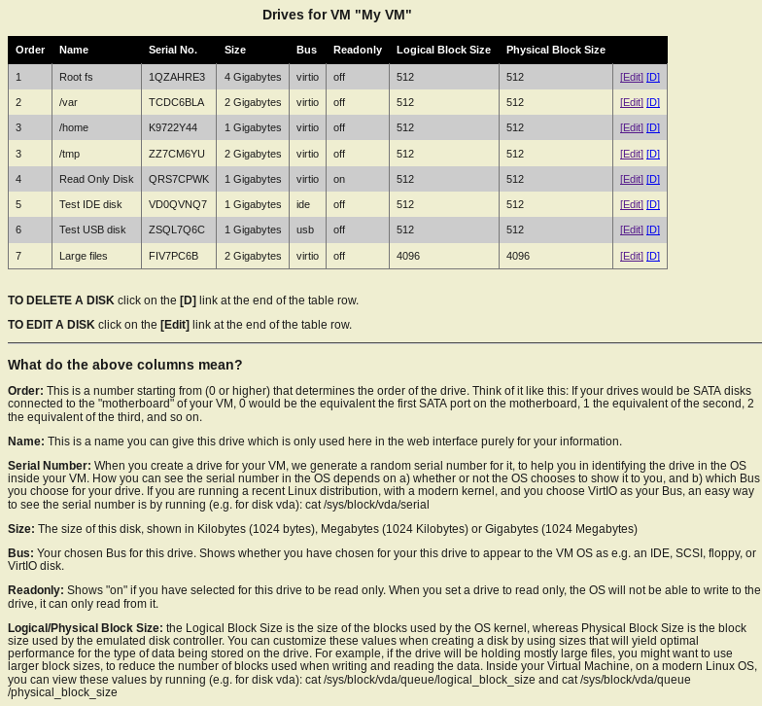
Most VPS providers give you only one virtual disk, and you only have the option of using partitioning inside your VPS to sub-divide your storage. Instead, we allow you to create and delete as many disks as you like within your allocated amount of storage. Each disk is presented to the virtualised OS as a full disk drive, not just a partition. You can then partition each disk as you please, or just use each one as it is without having to worry about partitioning. The screen shot opposite shows the page in the Control Panel where you can list all the disks for an individual VPS.
Advanced Disk Settings
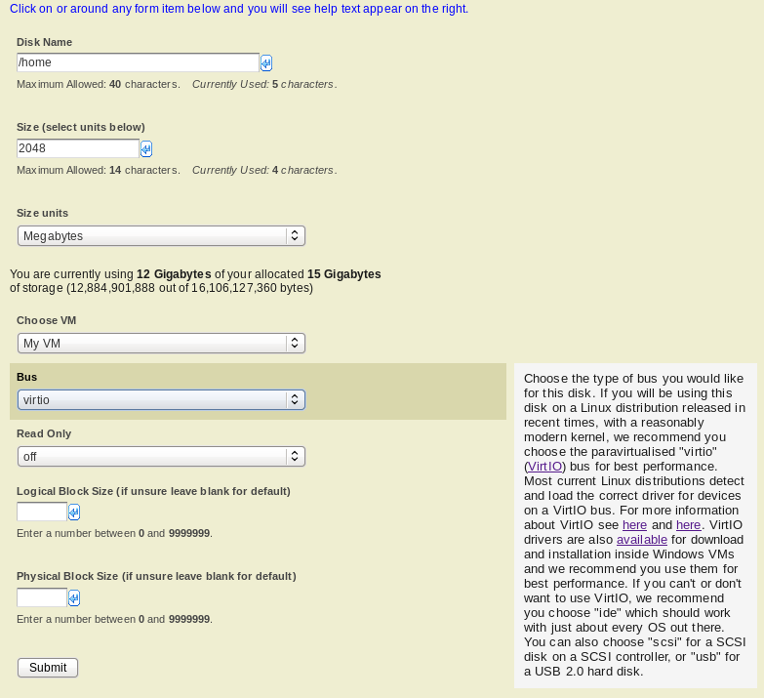
For each disk, you can choose the virtualised bus the disk should be connected to (VirtIO, IDE, SCSI or USB) and whether the disk should be set to Read Only (handy if you have some data you want to ensure cannot be modified inside the VPS). These settings can be changed in the Control Panel at any time, either on disk creation or any time afterwards. Additionally, at disk creation time, you can choose the Logical and Physical Block size, allowing you to maximise performance depending on what type of data you intend to store on that disk. As if that were not enough control, you can also move disks between different VPS’ at any time, if you have multiple VPS’. The screen shot opposite shows the Disk Creation page in the Control Panel.
Advanced Power Control
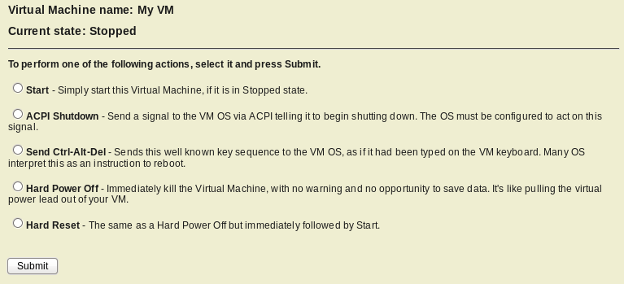
This page allows you to control the running of your VPS. Here you can start, stop and reboot your VPS. You can perform a shutdown either gracefully (if the installed OS has ACPI enabled and configured correctly) or by just “pulling the plug” on the VPS. Additionally you can send the Ctrl-Alt-Del key sequence to your VPS to signal a reboot.
Keep track of jobs
Whenever you ask for something to be done inside the Control Panel, such as reboot your VPS, or create a disk, the system records your request and goes off to perform the “job” you asked for. If you have used other VPS providers, you’ll know that usually, after you have issued an instruction in the Control Panel, you then have to sit waiting in the dark, wondering if your command has been executed successfully or not. Not so with us. Every job can be tracked in the Job Queue page.
